Wednesday, November 24, 2010

MySQL Dump/Restore

MySQL Backup:-

1. Dump ALL MySQL Databases

mysqldump --user=XXXXXXXX --password=XXXXXXX -A > /PATH/TO/DUMPFILE.SQL

2. Dump Individual or Multiple MySQL Databases

mysqldump --user=XXXXXXXX --password=XXXXXXX --databases DB_NAME1 DB_NAME2 DB_NAME3 > /PATH/TO/DUMPFILE.SQL

MySQL Restore:-

mysql --verbose --user=XXXXXXXX --password=XXXXXXXX DB_NAME < Path of the MySQL backup


Friday, November 12, 2010

Limit the users access to Linux in a time range

In the cases when you want to limit the access to a Linux operating system in a time range, you would like to use pam_time.so. pam_time was written by Andrew G. Morgan.

Take a look at /etc/security/time.conf

To limit for example ssh access from 23:00 PM and 08:00 AM.
sshd;*;*;!Al2300-0800

The format of the file is:
Service;ttys;users;time

the !Al means, anything except "All the days".

If you would like to permit people from 4 to 8 PM all the days, except root:
login;*;!root;!Al1600-2000

Further reading:man time.conf


How to track in Linux which files have been deleted and by who ?

This is a hack you can use to control file deletion and know exactly who deleted a file.

The trick is to add into the /etc/profile file this script:

 rm () { echo `id` deleted the file $1 at `date` >> /tmp/.log; /bin/rm $1; }

The log file will show you this:

uid=500(walter) gid=500(walter) groups=500(walter) deleted the file test at Mon Nov 26 10:31:16 ART 2007 


To print also the hostname where the deletion has come from:

$ rm() { i=`tty | cut -d / -f 3,4`;host=`w | grep $i | awk '{print $3}'`;echo -e `id` deleted the file $1 at `date` comming from "$host\n" >> /tmp/.log;/bin/rm "$@";}


The output would be:


uid=0(root) gid=0(root) groups=0(root),1(bin),2(daemon),3(sys),4(adm),6(disk),10(wheel),503(devel) deleted the file at Tue Nov 27 15:09:14 ART 2007 comming from serverlinux.blogspot.com


The problem of this solution is that if the user is some curious, he could know about this "set" variable, and:

* Unset the variable
* Execute the binary calling it directly

So, if you need the best way, you will have to write a little C script that replaces the original "rm" binary and rename the original "rm" binary to "rm.orig". Now, the "rm" binary should log the deletion of the file and then execute the "rm.orig", obviously, changing the process name to "rm", so the user do not suspects.


Wednesday, October 13, 2010

Useradd shell script for Linux

Useradd shell script for Linux. You need to save usernames in /tmp/ulist. Username and password will be the same.

#!/bin/bash
#Purpose : Add multiple users with password
#Author   : Ranjith Kumar R
#Date      : 14th Oct 2010

if [ $(id -u) -eq 0 ]; then
for i in `cat /tmp/ulist`
do
egrep "^$i" /etc/passwd >/dev/null
if [ $? -eq 0 ]; then
                echo "$i exists!"
else
pass=$(perl -e 'print crypt($ARGV[0], "password")' $i)
useradd -p $pass $i
fi
done
else
echo "Only root may add a user to the system"
        exit 2
fi


Saturday, September 4, 2010

How to change the windows 2003 product key?

Step 1 : Run regedit and go to: HKey_Local_Machine\Software\Microsoft\WindowsNT\Current Version\WPAEvents, on the right double click on "oobetimer" and change at least one digit of this value to deactivate windows.

Step 2 : Choose run from start menu and type in this command: t to get the activation screen and go to the second option which is activate by phone.

Step 3 : In the new screen choose the option to change product key, and type in the new product key (Corporate one only).

Step 4 : In the new screen choose the option to change product key, and type in the new product key (Corporate one only).


How to reset forgotten root password in SuSE Enterprise Server

We do sometimes forget our passwords and what more when we don’t login to that particular account regularly.  As good system administrators who automate most of the administrative tasks, we sometimes do not login to the root account often.  This is especially so for a highly reliable and robust SLES based system.

The following technique would also work for OpenSuSE, and also most other distributions.

Step 1:  Boot your server using the installation DVD.  If the server is already powered on, you will need to do a hard power-on as you can’t shutdown (since you don’t have the root password).


Step 2: Select “Resue System” and login as root.  No password is required here.


Step 3 : You have now booted into the live DVD, that is, you have booted from the DVD and the file system mounted is that of the DVD.  You will need to access your Hard Disk Drive which is not mounted by default. (In my scenario, my SuSE 11 partition is on an extended partition and is on device /dev/sda7.  Yours maybe different and if your system is a pure SuSE 11 (which should be the case), it is likely to be /dev/sda1, if using SATA or SCSI.  If using IDE, you can try /dev/hda1. To access (mount) the SuSE 11 partition on directory /mnt;

Use the below command

 #mount /dev/sda7 /mnt

Step 4: Edit /mnt/etc/shadow which is where the encrypted passwords are stored. Note that you are not suppose to edit /etc/shadow which is one used for the Live DVD.  Furthermore, you won’t be able to save the /etc/shadow as it is a read-only filesystem.

Step 5:  Search for the entry starting with “root:”.

Step 6: Remove 2nd field (the fields are separated by the ‘:’, resulting in something that resembles

root::14329::::::

Step 7: Save and exit your editor. Remove your DVD.

Step 8: Boot into single user mode by keying in “single” at the GRUB boot menu.  You will not be able to access or change root password if you boot into graphical mode.


Step 9: After booting, you will be greeted on the command line with “Press enter for login:”, do as it says and you are in.

Step 10 : Change root password by “passwd”.  Reboot.the system, now you will be able to login with your new password.


Wednesday, September 1, 2010

How to enable proxy arp on Linux 2.4

What is proxy arp?

When you turn on proxy arp for a network interface card (nic), then it will answer all arp requests with its own ip-address. What does this mean?
  • When a computer wants to send an ip packet it first decides, wether the destination ip address is on the same LAN or the packet must be sent to a router (which must be on the same LAN).
  • Before it can deliver the packet to the LAN, it must know the recipient's Ethernet MAC address.
  • In order to determine the MAC address it sends an ARP broadcast package to the LAN asking "who has ip address a.b.c.d".
  • Normally only the computer with that ip address answers.
  • Proxy arp changes that: A computer doing proxy arp answers all ARP requests with its own MAC address.
  • The asking computer retrieves the MAC address and sends the packet to that computer.

When do you need proxy arp?

Proxy arp is a solution if for some reason you cannot configure a computer or other device on the LAN to use your computer as gateway instead of another one or instead of delivering all packets locally to the LAN.

How is it turned on with Linux?

With one simple command: Let's say your nic is eth1. The command would then be this:
# echo 1 > /proc/sys/net/ipv4/conf/eth1/proxy_arp

Turning it off again is done by: 
# echo 0 > /proc/sys/net/ipv4/conf/eth1/proxy_arp

Checking wether it's turned on: 
# cat /proc/sys/net/ipv4/conf/eth1/proxy_arp


Monday, August 30, 2010

Evolution not starting when using /home via NFS

Symptom
 You have mounted your /home directory via NFS. You want to start evolution but get an error message about something wrong with a lock. You are using SuSE Linux 9.0 (or mayby 8.1 or 8.2).


Reason

 
Evolution uses gconf for storing the configuration and that wants to lock a file in ~/.gconf before starting evolution. But the nfs lock daemon is not running and gconf cannot get that lock via NFS. SuSE has not activated the start script /etc/init.d/nfslock per default:

# chkconfig nfslock
nfslock off

Solution
Activate the service nfslock and start it:

# chkconfig --add nfslock
nfslock 0:off 1:off 2:off 3:on 4:off 5:on 6:off

# rcnfslock start
Starting NFS file locking daemon done
Starting NFS stat daemon done


Sunday, August 29, 2010

How to login without password from One linux server to other

For E.g. want to ssh from linux server-A to the other linux server-B without password follow the below steps.

From the source linux server(linux server-A)

Step1: Login to the server and the the command  "ssh-keygen"

Generating public/private rsa key pair.

Step2:  Enter the path/location where you want to save the sshkey(you can give any name for saving the sshkey)

Enter file in which to save the key (/root/.ssh/id_rsa): /root/.ssh/sshkey
Press enter key

Step3: You will get "Enter passphrase (empty for no passphrase):" in terminal
Press enter key

Step4: You will get "Enter same passphrase again: " in terminal
Press enter key

Step5: You will get "Your identification has been saved in /root/.ssh/sshkey." in terminal
Your public key has been saved in /root/.ssh/sshkey.pub

The key fingerprint is:
39:3c:3c:68:ca:fb:fc:95:e6:e0:6b:d2:0e:b9:e6:21 root@linux-xwkz


Step6: Enter this command in terminal "vi /root/.ssh/keyname.pub"


Copy the key


Step7 : run the below command to add copied key to the Destination server(linux server-B]
vi /root/.ssh/authorized_keys


paste the key in to "authorized_keys" file


Step8: restart sshd service.
service sshd restart


Now you will able to ssh without password from "linux server-A" to "linux server-B"


Thursday, August 26, 2010

Linux detailed booting process

 Overview


System startup

     The system startup stage depends on the hardware that Linux is being booted on. On an embedded platform, a bootstrap environment is used when the system is powered on, or reset. Examples include U-Boot, RedBoot, and MicroMonitor from Lucent. Embedded platforms are commonly shipped with a boot monitor. These programs reside in special region of flash memory on the target hardware and provide the means to download a Linux kernel image into flash memory and subsequently execute it. In addition to having the ability to store and boot a Linux image, these boot monitors perform some level of system test and hardware initialization. In an embedded target, these boot monitors commonly cover both the first- and second-stage boot loaders.

Extracting the MBRTo see the contents of your MBR, use this command:

# dd if=/dev/hda of=mbr.bin bs=512 count=1
# od -xa mbr.bin
     The dd command, which needs to be run from root, reads the first 512 bytes from /dev/hda (the first Integrated Drive Electronics, or IDE drive) and writes them to the mbr.bin file. The od command prints the binary file in hex and ASCII formats.
     In a PC, booting Linux begins in the BIOS at address 0xFFFF0. The first step of the BIOS is the power-on self test (POST). The job of the POST is to perform a check of the hardware. The second step of the BIOS is local device enumeration and initialization.
     Given the different uses of BIOS functions, the BIOS is made up of two parts: the POST code and runtime services. After the POST is complete, it is flushed from memory, but the BIOS runtime services remain and are available to the target operating system.
     To boot an operating system, the BIOS runtime searches for devices that are both active and bootable in the order of preference defined by the complementary metal oxide semiconductor (CMOS) settings. A boot device can be a floppy disk, a CD-ROM, a partition on a hard disk, a device on the network, or even a USB flash memory stick.
     Commonly, Linux is booted from a hard disk, where the Master Boot Record (MBR) contains the primary boot loader. The MBR is a 512-byte sector, located in the first sector on the disk (sector 1 of cylinder 0, head 0). After the MBR is loaded into RAM, the BIOS yields control to it.

Stage 1 boot loader

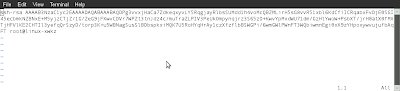
     The primary boot loader that resides in the MBR is a 512-byte image containing both program code and a small partition table (see Figure 2). The first 446 bytes are the primary boot loader, which contains both executable code and error message text. The next sixty-four bytes are the partition table, which contains a record for each of four partitions (sixteen bytes each). The MBR ends with two bytes that are defined as the magic number (0xAA55). The magic number serves as a validation check of the MBR.

               Figure 2. Anatomy of the MBR


      The job of the primary boot loader is to find and load the secondary boot loader (stage 2). It does this by looking through the partition table for an active partition. When it finds an active partition, it scans the remaining partitions in the table to ensure that they're all inactive. When this is verified, the active partition's boot record is read from the device into RAM and executed.

Stage 2 boot loader

     The secondary, or second-stage, boot loader could be more aptly called the kernel loader. The task at this stage is to load the Linux kernel and optional initial RAM disk.

GRUB stage boot loaders

     The /boot/grub directory contains the stage1, stage1.5, and stage2 boot loaders, as well as a number of alternate loaders (for example, CR-ROMs use the iso9660_stage_1_5).
     The first- and second-stage boot loaders combined are called Linux Loader (LILO) or GRand Unified Bootloader (GRUB) in the x86 PC environment. Because LILO has some disadvantages that were corrected in GRUB, let's look into GRUB.
     The great thing about GRUB is that it includes knowledge of Linux file systems. Instead of using raw sectors on the disk, as LILO does, GRUB can load a Linux kernel from an ext2 or ext3 file system. It does this by making the two-stage boot loader into a three-stage boot loader. Stage 1 (MBR) boots a stage 1.5 boot loader that understands the particular file system containing the Linux kernel image. Examples include reiserfs_stage1_5 (to load from a Reiser journaling file system) or e2fs_stage1_5 (to load from an ext2 or ext3 file system). When the stage 1.5 boot loader is loaded and running, the stage 2 boot loader can be loaded.
     With stage 2 loaded, GRUB can, upon request, display a list of available kernels (defined in /etc/grub.conf, with soft links from /etc/grub/menu.lst and /etc/grub.conf). You can select a kernel and even amend it with additional kernel parameters. Optionally, you can use a command-line shell for greater manual control over the boot process.
     With the second-stage boot loader in memory, the file system is consulted, and the default kernel image and initrd image are loaded into memory. With the images ready, the stage 2 boot loader invokes the kernel image.

Kernel

     Manual boot in GRUBFrom the GRUB command-line, you can boot a specific kernel with a named initrd image as follows:

grub> kernel /bzImage-2.6.14.2
[Linux-bzImage, setup=0x1400, size=0x29672e]
grub> initrd /initrd-2.6.14.2.img
[Linux-initrd @ 0x5f13000, 0xcc199 bytes]
grub> boot
Uncompressing Linux... Ok, booting the kernel.

     If you don't know the name of the kernel to boot, just type a forward slash (/) and press the Tab key. GRUB will display the list of kernels and initrd images.

     With the kernel image in memory and control given from the stage 2 boot loader, the kernel stage begins. The kernel image isn't so much an executable kernel, but a compressed kernel image. Typically this is a zImage (compressed image, less than 512KB) or a bzImage (big compressed image, greater than 512KB), that has been previously compressed with zlib. At the head of this kernel image is a routine that does some minimal amount of hardware setup and then decompresses the kernel contained within the kernel image and places it into high memory. If an initial RAM disk image is present, this routine moves it into memory and notes it for later use. The routine then calls the kernel and the kernel boot begins.
     When the bzImage (for an i386 image) is invoked, you begin at ./arch/i386/boot/head.S in the start assembly routine (see Figure 3 for the major flow). This routine does some basic hardware setup and invokes the startup_32 routine in ./arch/i386/boot/compressed/head.S. This routine sets up a basic environment (stack, etc.) and clears the Block Started by Symbol (BSS). The kernel is then decompressed through a call to a C function called decompress_kernel (located in ./arch/i386/boot/compressed/misc.c). When the kernel is decompressed into memory, it is called. This is yet another startup_32 function, but this function is in ./arch/i386/kernel/head.S.
     In the new startup_32 function (also called the swapper or process 0), the page tables are initialized and memory paging is enabled. The type of CPU is detected along with any optional floating-point unit (FPU) and stored away for later use. The start_kernel function is then invoked (init/main.c), which takes you to the non-architecture specific Linux kernel. This is, in essence, the main function for the Linux kernel.

Figure 3. Major functions flow for the Linux kernel i386 boot   


     With the call to start_kernel, a long list of initialization functions are called to set up interrupts, perform further memory configuration, and load the initial RAM disk. In the end, a call is made to kernel_thread (in arch/i386/kernel/process.c) to start the init function, which is the first user-space process. Finally, the idle task is started and the scheduler can now take control (after the call to cpu_idle). With interrupts enabled, the pre-emptive scheduler periodically takes control to provide multitasking.
     During the boot of the kernel, the initial-RAM disk (initrd) that was loaded into memory by the stage 2 boot loader is copied into RAM and mounted. This initrd serves as a temporary root file system in RAM and allows the kernel to fully boot without having to mount any physical disks. Since the necessary modules needed to interface with peripherals can be part of the initrd, the kernel can be very small, but still support a large number of possible hardware configurations. After the kernel is booted, the root file system is pivoted (via pivot_root) where the initrd root file system is unmounted and the real root file system is mounted.

Decompress_kernel output

     The decompress_kernel function is where you see the usual decompression messages emitted to the display:

Uncompressing Linux... Ok, booting the kernel.
 
     The initrd function allows you to create a small Linux kernel with drivers compiled as loadable modules. These loadable modules give the kernel the means to access disks and the file systems on those disks, as well as drivers for other hardware assets. Because the root file system is a file system on a disk, the initrd function provides a means of bootstrapping to gain access to the disk and mount the real root file system. In an embedded target without a hard disk, the initrd can be the final root file system, or the final root file system can be mounted via the Network File System (NFS).
 
Init

     After the kernel is booted and initialized, the kernel starts the first user-space application. This is the first program invoked that is compiled with the standard C library. Prior to this point in the process, no standard C applications have been executed.
     In a desktop Linux system, the first application started is commonly /sbin/init. But it need not be. Rarely do embedded systems require the extensive initialization provided by init (as configured through /etc/inittab). In many cases, you can invoke a simple shell script that starts the necessary embedded applications.

Summary

     Much like Linux itself, the Linux boot process is highly flexible, supporting a huge number of processors and hardware platforms. In the beginning, the loadlin boot loader provided a simple way to boot Linux without any frills. The LILO boot loader expanded the boot capabilities, but lacked any file system awareness. The latest generation of boot loaders, such as GRUB, permits Linux to boot from a range of file systems (from Minix to Reiser).

Author : M. Tim Jones


How does traceroute works?

                           When you execute a trace route command (ie trace route google.com), your machine sends out 3 UDP packets with a TTL (Time-to-Live) of 1. When those packets reach the next hop router, it will decrease the TTL to 0 and thus reject the packet. It will send an ICMP Time-to-Live Exceeded (Type 11), TTL equal 0 during transit (Code 0) back to your machine - with a source address of itself, therefore you now know the address of the first router in the path.

                            Next your machine will send 3 UDP packets with a TTL of 2, thus the first router that you already know passes the packets on to the next router after reducing the TTL by 1 to 1. The next router decreases the TTL to 0, thus rejecting the packet and sending the same ICMP Time-to-Live Exceeded with its address as the source back to your machine. Thus you now know the first 2 routers in the path.

                          This keeps going until you reach the destination. Since you are sending UDP packets with the destination address of the host you are concerned with, once it gets to the destination the UDP packet is wanting to connect to the port that you have sent as the destination port, since it is an uncommon port, it will most like be rejected with an ICMP Destination Unreachable (Type 3), Port Unreachable (Code 3). This ICMP message is sent back to your machine, which will understand this as being the last hop, therefore trace route will exit, giving you the hops between you and the destination.

                         The UDP packet is sent on a high port, destined to another high port. On a Linux box, these ports were not the same, although usually in the 33000. The source port stayed the same throughout the session, however the destination port was increase by one for each packet sent out.

                        One note, traceroute actually sends 1 UDP packet of TTL, waits for the return ICMP message, sends the second UDP packet, waits, sends the third, waits, etc, etc, etc. If during the session, you receive * * *, this could mean that that router in the path does not return ICMP messages, it returns messages with a TTL too small to reach your machine or a router with buggy software. After a * * * within the path, trace route will still increment the TTL by 1, thus still continuing on in the path determination.


How-To: Fix service check time outs in Nagios + NRPE deployment

Once you get used to writing plug-ins in Nagios and the complexity of the plug-ins you write grows, you may encounter this error, service check timed out.

If some of your service checks have this problem, you can isolate the problem in these 3 values:

1. how slow is the plugin

This is the first thing you should do. Check if how much time does your plugin needs before it can finish checking and provide an exit status. Log-on to the server your monitoring and run the plugin locally. Use the time command to measure.

$ time /usr/lib/nagios/plugins/check_service

2. how short is NRPE’s patience

Once you have the value (in seconds) in step #1, check your NRPE configuration in that same server . The default location of NRPE’s configuration is /etc/nagios/nrpe.cfg
Find this parameter, command_timeout. The value of this parameter, in seconds, must be greater than the value that you’ve got in
step #1.
Once the parameter’s been set, restart the NRPE service (service nrpe restart).

3. how short is Nagios’ patience

Nagios executes a command, check_nrpe, to connect to a NRPE service. check_nrpe has a timeout paramer, -t. This parameter must have a bigger value than the one you set in
step #2.
Log-on to your Nagios server and you can set this by opening the commands configuration file, /etc/nagios/objects/commands.cfg
Find check_nrpe, and edit its command_line and set the -t parameter. For instance, if you want the timeout value to be 500 seconds, it will look like this:
command_line $USER1$/check_nrpe -H $HOSTADDRESS$ -c $ARG1$ -t 500
Restart the Nagios service afterwards (service nagios restart).